Monday, October 18, 2021

Project-Zero: Wiper Arm Modification

NOTE: I am not using these wiper arms.  Instead I bought a better set from an outfit in the UK.

The wiper arms that shipped with my GBS Zero kit were way too long and needed to be modified. The first go at this I just cut the blade to fit but that was...not good.

The second go, I drilled out the rivets holding the wiper arm together, marked the length needed for the the blade fit the windscreen at the highest point in its sweep.  Marked it up, then drilled the arm. Before I riveted the arm back together, I made the same mod to the other wiper arm using the first as template so that they're the identical length.

Before and after pic.


Thursday, October 7, 2021

Project-Zero: Charge Warning Lamp Circuit

 Not that long ago I built an alternator exciter/charge warning indicator for the Zero.  I thought I would follow that up a bit.

The idea is that you want to have a way to 1) excite the alternator field so that it actually charges at idle and 2) have something that will tell you when the alternator is putting out less juice than it should be.

The circuit itself is very simple and has been used in cars since the invention of alternators.  basically, you you create a circuit with a diode and a resistance load that connects the positive terminal of the battery with the positive output of the alternator.

If the forward voltage from the alternator is greater than the forward voltage from the battery, the diode will force current to flow through the nominal load of the resistor and prevent the lamp/led from illuminating. 

If the forward voltage from the battery is greater than the voltage from the alternator, current will flow through the diode thus illuminate the warning signal.


My particular circuit uses an LED because...well...the circuit required a diode so why shouldn't it do double duty?  You can make the exact same circuit using an incandescent bulb but...why?  Anyway, I've included diagrams of an incandescent version of the same below.


Wednesday, October 6, 2021

Project-Zero: Steering Wheel stuff.

 After spending a good amount of time in the car last week doing the CHP inspection/VIN assignment thing I've decided that I need to revisit the steering wheel on my Zero a bit.

  • The hub adapter and quick release adapter length is ridiculously long and not really all that comfortable to use. 
  • The steering wheel feels a little too small for my liking.

The quick release is ~2.5 inches long, the hub is ~3.3 inches long.  It's just...dumb.

For now, I'm deleting the quick release. In the future I'll modify the steering wheel hub adapter (cut off the crash structure, drill and tap bolt holes) and maybe swap to a thin quick release adapter. (https://getnrg.com/collections/quick-releases/products/srk-400)

As for the wheel, I've swapped in my spare NRG 320mm steering wheel to see if I like it any more than the 300mm MOMO wheel.

Friday, September 24, 2021

Project-Zero: Bosch TMAP ( P/N: 0 261 230 044 ) pinouts

Because I couldn't find particularly good information on this sensor I went down a few wrong paths while troubleshooting an issue that I was having with it. For that reason, I'm making this post so that FutureMe will have this information that PresentMe is sure to forget in very short order.

If you find this information useful, GREAT! But also know that it not derived from any official sources so your mileage may vary and I'm not responsible if you break your sensor, your car, or burn your house down while trying to get your TMAP sensor working.


Temperature Calibration Table

This calibration table is for the Bosch NTC type thermistor. These values seem to be accurate for this sensor but are not taken directly from any form of documentation regarding this specific part number because I can't find documentation about this specific part number.

Bosch NTC
OhmsOutput V
45,3134.89
26,1144.82
15,4624.70
9,3974.52
5,8964.27
3,7923.96
2,5003.57
20573.36
1,7073.15
1,1752.70
8342.27
5961.87
4361.52
3231.22
2430.98
1870.79
1440.63
1130.51
890.41

Pressure Calibration

This pressure calibration is a wild-ass guess. Don't use.  If I find more information I'll add it. (This assumes that this is a 4-bar MAP, which I don't think it is.  I think it's probaby a 1-2 bar MAP sensor but I haven't been able to confirm that yet.)

Pressure
V outBarPSI
0.38600
4.5458

Monday, September 20, 2021

Project-Zero: Intake Air Temperature Issues

Problem

While zipping around in the Zero for inspections I noticed that the intake air temperature appears to be stuck at 104˚f (40˚c) with zero fluctuation.  The car is drivable but it's not an ideal situation as the ECU may adjust fueling to account for temperatures.

Investigation

Connecting up to Emerald K6 ECU confirmed the ECU deferred to the default IAT value, 40˚c and a sensor fault.

  • To verify the ECU was fine I wired in a Delphi sensor/calibration.
    • Returned 78˚f with no faults. (Ambient for the evening in my garage)
  • Swapped pins around for the FoMoCo TMAP. <=== THIS WAS NOT THE PROBLEM.
    • No ECU faults but a very incorrect temperature (127.4˚f).
    • I suspect that the TMAP is broken. <=== THIS WAS THE PROBLEM.

In the process of swapping pins I went a little too hard and snapped one of the pin catches off which will require a replacement.

Next Steps

  • Plan A) (Plan A was the solution)
    • Replace the broken connector housing.
    • Replace the [potentially] broken TMAP.
      • Replacements have been sourced from RockAuto.
  • Plan B) (Plan B was not needed.)
    • Roll forward with the GM IAT sensor and source a GM 3-bar MAP sensor.
      • Split the sensor ground.
      • Has the advantage that I would absolutely know the calibration values for each sensor.

Notes

Sunday, September 12, 2021

Project-Zero: ETB Fuel Level Sender and Gauge

 The Zero has been on stands for a few weeks while I work on small things.  Last time I updated here I was working on calibrating the Smiths fuel level sender to work with the AIM dash.

That didn’t go well.

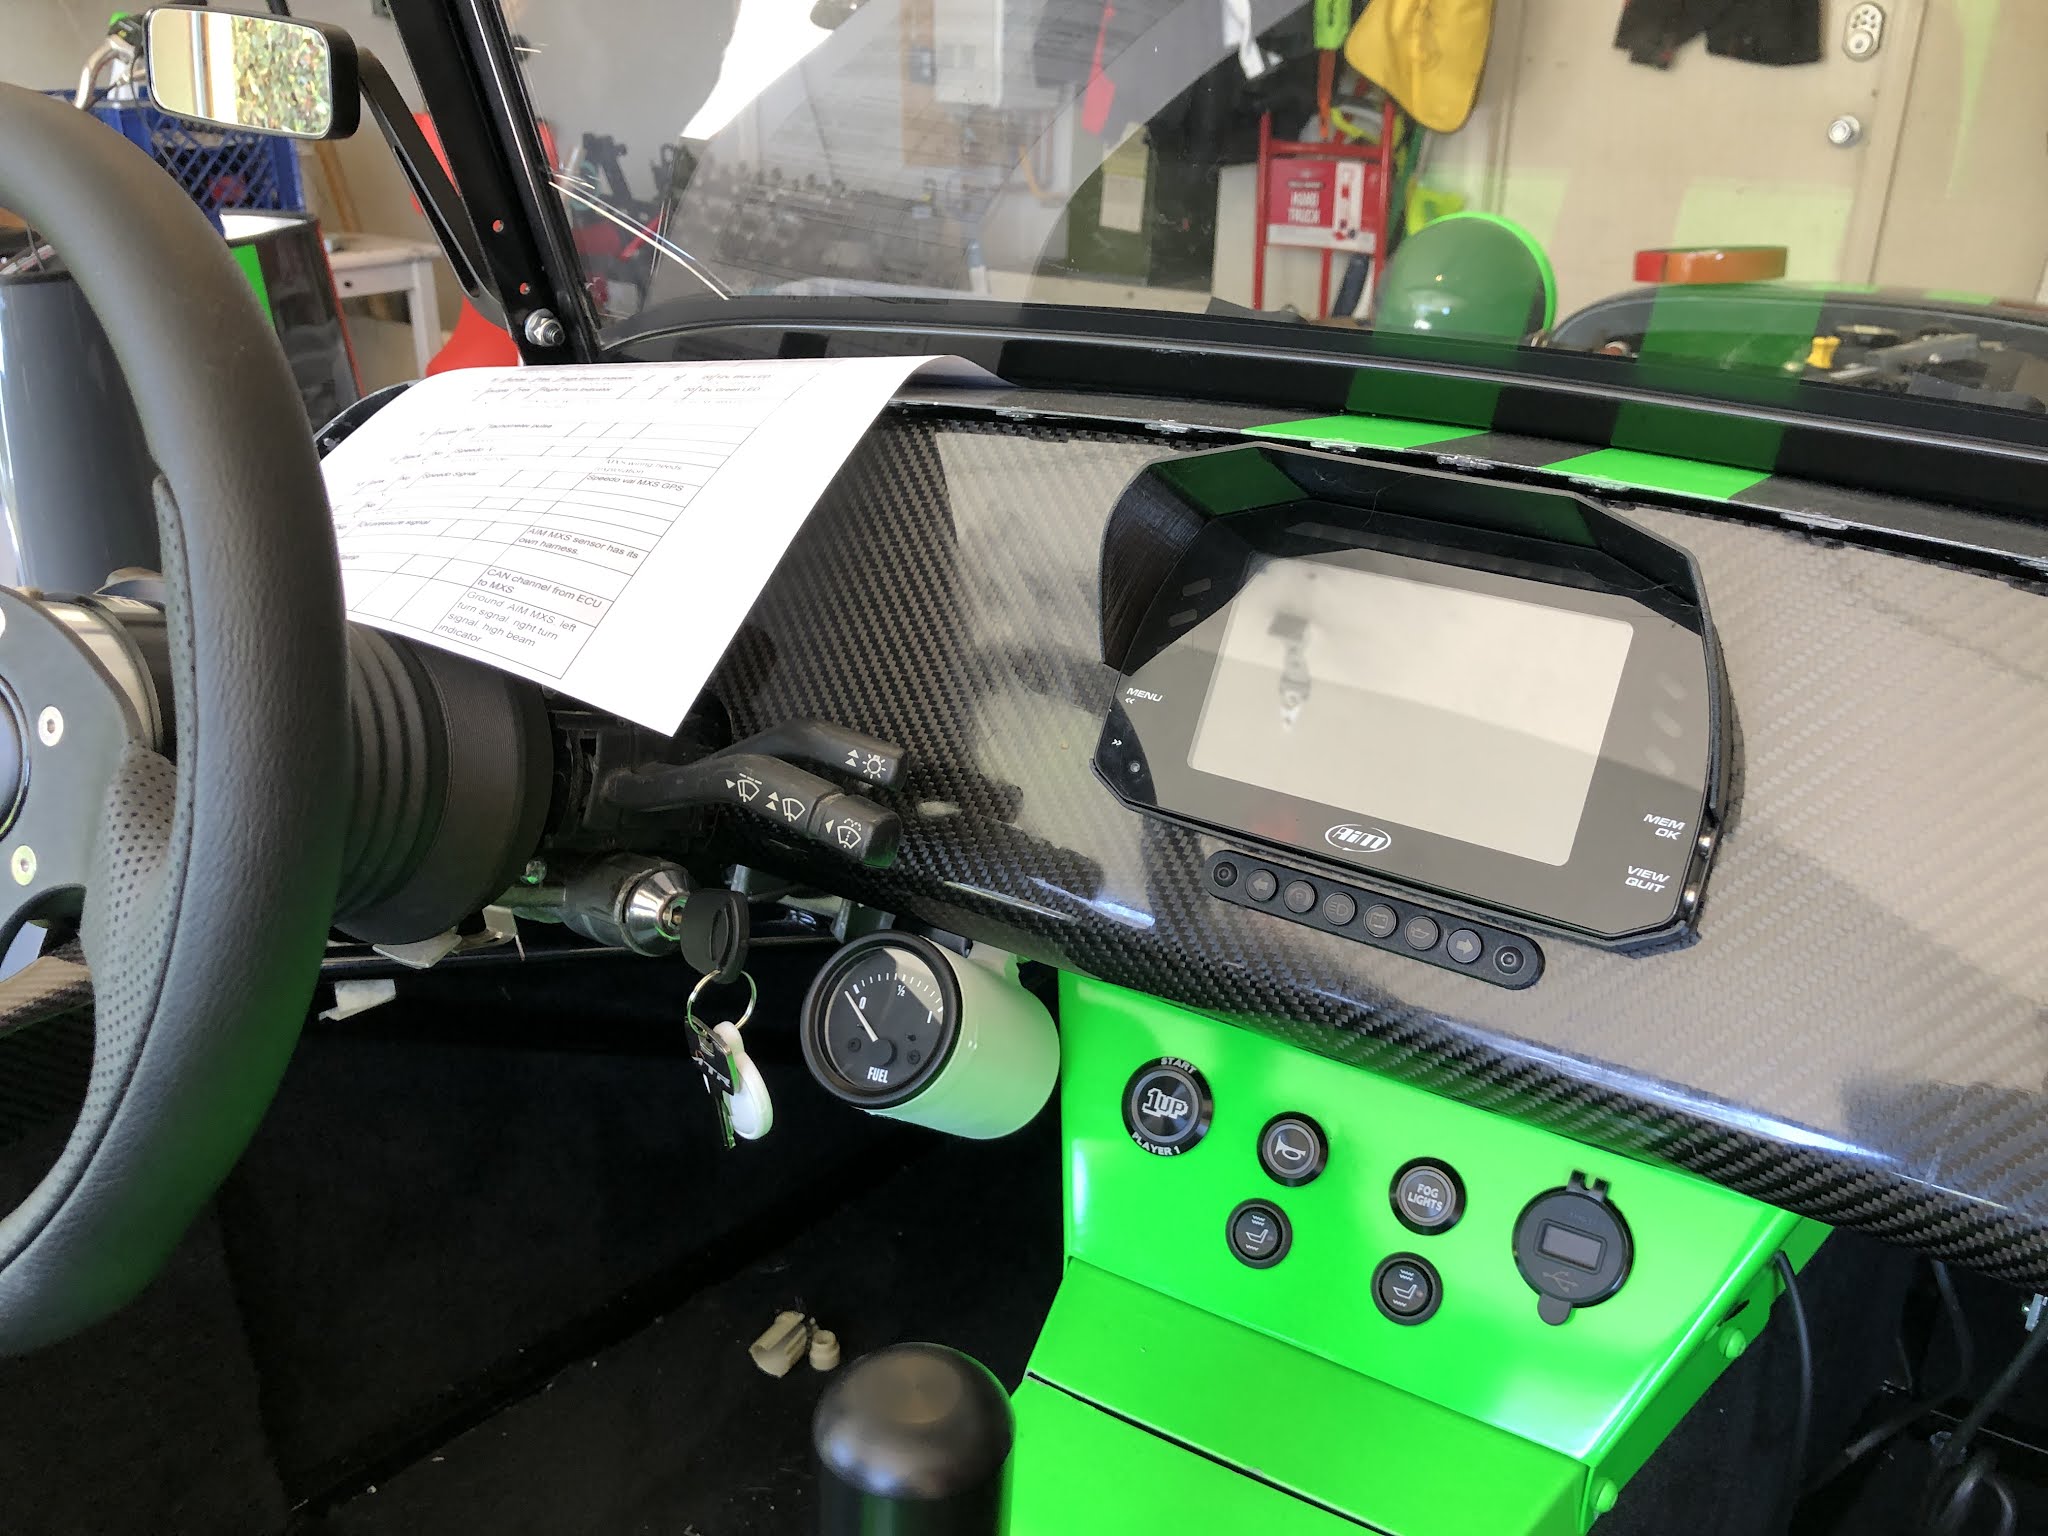
Eventually I’ll revisit the notion of having the AIM display fuel level but for now I’m throwing an ETB Instruments sender and GT40 style gauge into a 3D printed pod sticky-taped to the dash. I went with ETB because their sender fit the bolt battery GBS use on their tank so it was easy.

The lever arm of the sender needed to be adjusted for length to keep it from hitting the sides or bottom of the tank. (There’s about 3/4” between the bottom of the float and tank at full droop.) This provides a bit of a buffer at ‘E’ which is good since the car’s tank realistically only holds 7.5 US gallons of fuel.

The gauge is wired to the send through the factory harness, not the AIM harness I built.  For simplicity I’m taking switched power and ground from the USB charger/voltmeter in the center console. The gauge pod is my own design that uses GoPro mounting hardware and 3M mounting tape to stick to the underside of the carbon fiber dashboard.  I didn’t bother wiring up the gauge illumination.

Anyway, I now have a working fuel level gauge which is honestly all that I care about while working out confidence in what kind of range I’m going to be able to get out of this car.